New Year, New Digital Bullet Journal Notebook
I like to begin each year with a brand new notebook in my digital bullet journal. It is a great way to start fresh. I’m going to walk you through my process of building a new notebook in the GoodNotes App. I’ll share a few different ideas for notebook covers and also let you know how I organize my templates so that I can easily use them every day.
Picking a New Notebook Cover
The GoodNotes App comes with quite a few built-in notebook covers for you to choose from. There are some basic designs that are solid colors as well as some that are patterned. These notebook covers are great, but they are basic.

If you would like to spruce up your notebook covers, there are a few things you can do. You can pick a plain colored notebook cover and then write on it using the built-in tools in GoodNotes.
You could also look online for some free transparent artwork to place on top of your cover of choice.
I have a few websites that I use to find open source illustrations and photos. My favorite site is Pixabay. They have a wonderful library of photos and illustrations that are downloadable and free. I use this website to find almost all of my featured images on this website. I have used illustrations from Pixabay in the bullet journal templates that I have designed for you in the resource library.
Here are some other sources of open-source images that you can use to create your notebook templates or cover images.
- https://pixabay.com
- https://www.pexels.com
- https://stocksnap.io
- https://unsplash.com
- https://www.reshot.com
- https://gratisography.com
Here is a great blog post that goes in-depth on lots of other websites for free photos.
Another option is to use one of your favorite photos as a notebook cover.
I designed some new 2021 covers that are available in my Resource Library. If you aren’t a subscriber yet, here is a link to subscribe for access.
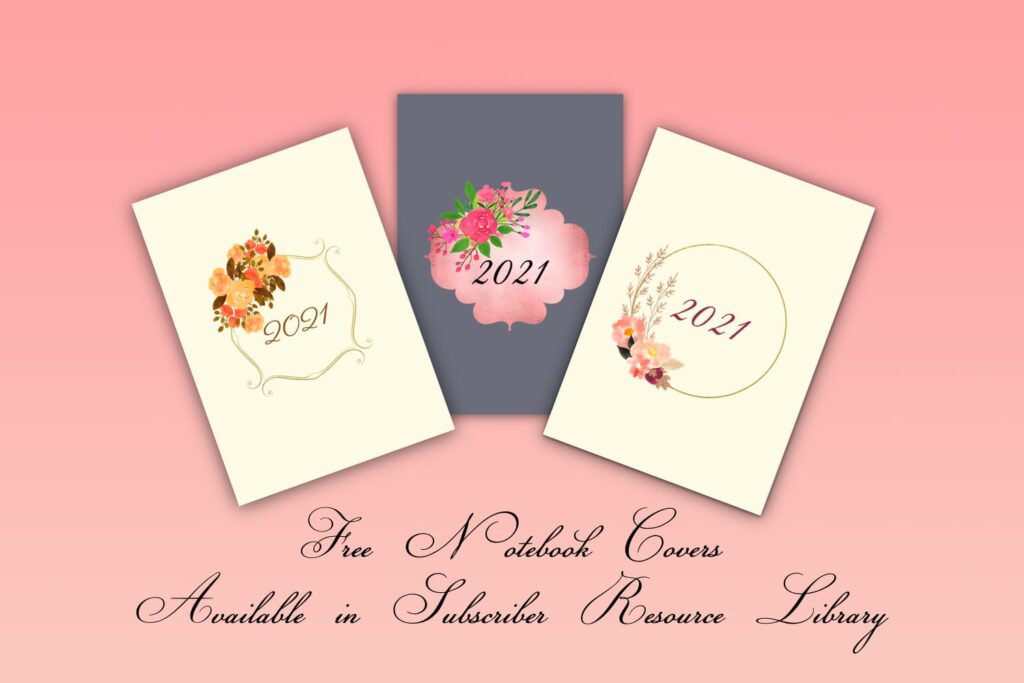
There is no right or wrong notebook cover. Make it fun and personalized!
Decide on Your Default Page for the Notebook
When you create a new notebook in GoodNotes, you have the opportunity to decide what the default page template is for this particular notebook. I usually choose a standard dot grid page as my default template. You can always pick a custom page from your template library, so don’t get too hung up on which page will be the perfect default template page.
Organize your Template Library
The next thing that I recommend doing is organizing your template library. I like to have each of my themed bullet journal collections in one row and nicely organized. This isn’t required, but I find it fun to scroll through my seasonal templates and pick just the right one for my mood.
Last year, I got creative and decided to create lots of different pages for each of the seasonal holidays.
Here are some of the holidays I designed pages for :
- New Year
- Valentine’s Day
- St Patricks Day
- Easter
- Mother’s Day
- Fourth of July
- Back to School
- Fall
- Christmas
Some of these holiday-themed templates are available in my resource library for free, so please subscribe for access.
Within each of my holiday collections, I have a variety of monthly, weekly, daily, and errand pages. These are handwritten to meet my own needs. When I come up with a new idea, I will make a page for the idea on plain paper. Then I will duplicate that page and add in my seasonal graphics. It makes it easy for me to create new template pages without redrawing each page.
How Do I Make The Templates?
I use GoodNotes to design all my bullet journal pages. I have created a special notebook for template creation, and I have all my standard pages in there. Then, I will duplicate a set and add in my seasonal graphics. Once I am done with the creation of my pages, I then go through the process of exporting and reimporting.
Importing New Templates into the GoodNotesTemplate Library
I haven’t yet figured out how to make a notebook page a template page right within the GoodNotes App.
Here is what I do instead. There are a few steps involved, but I really recommend going through the process because it is so much easier to use your pretty pages if they are in the Template Library.
If you have the desktop version of GoodNotes on your Mac, this process goes much faster because you can import multiple files at once into the Template Library.
Export and Import Process on iPad
- I use my iPad to export one template page at a time as a .pdf.
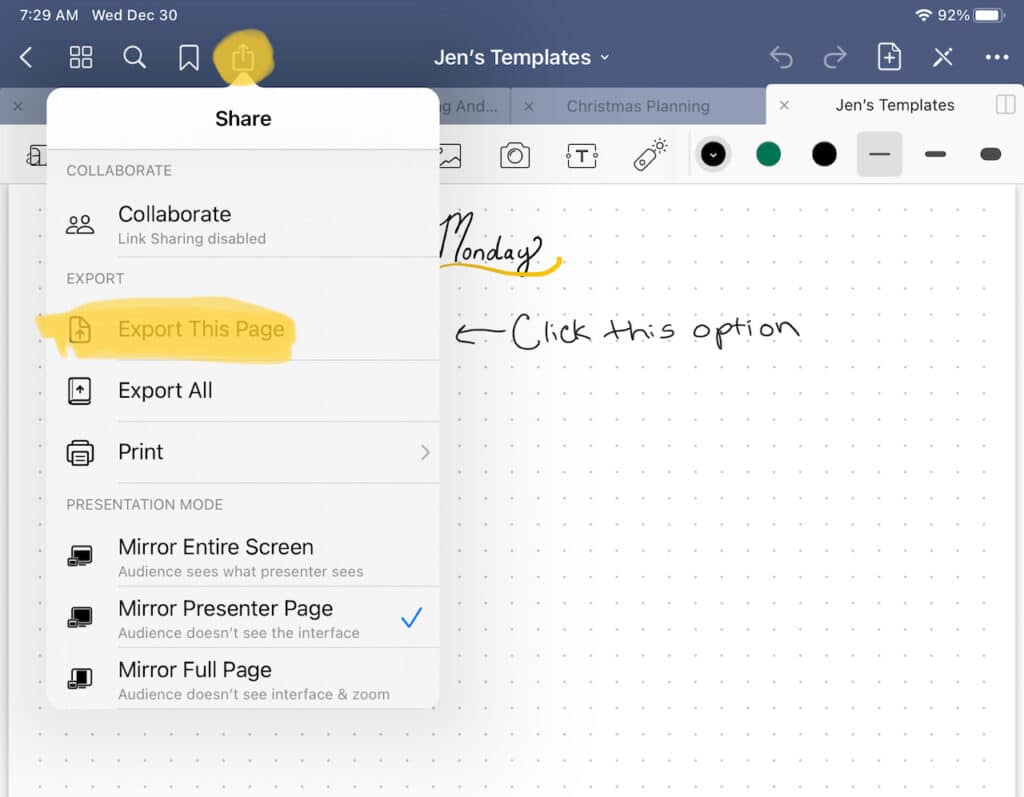
Here are the options to click when you export your page as a PDF - I will name it with the collection type first and then the page after. So if I am creating a template set of blue flowers- I will export a page entitled “Blue Flowers blank” or “Blue Flowers Monday”.

These three steps are important to do so that your file gets saved correctly on export. - I export all of my desired pages in a collection to a specific file, like in this case “Blue Flowers”, into the files app on my iPad.
- I repeat steps 1-3 as many times as needed to get all the template files exported as .pdf
- Then, I go into the template library on the GoodNotes App, which you can find by going to the gear menu on the top left of the Documents Screen.

Here is how to access the template library from the Main GoodNotes page within the app. - To add a New Template Collection click the plus symbol on the top right
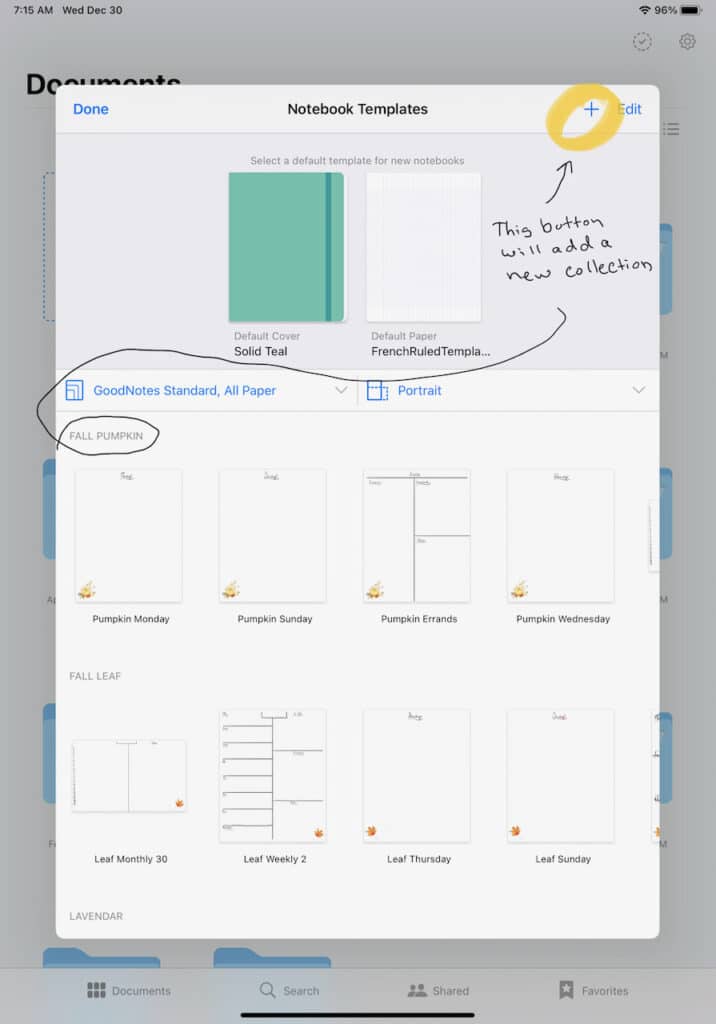
Click the plus symbol on the top to create a new template collection - Then, name your new collection
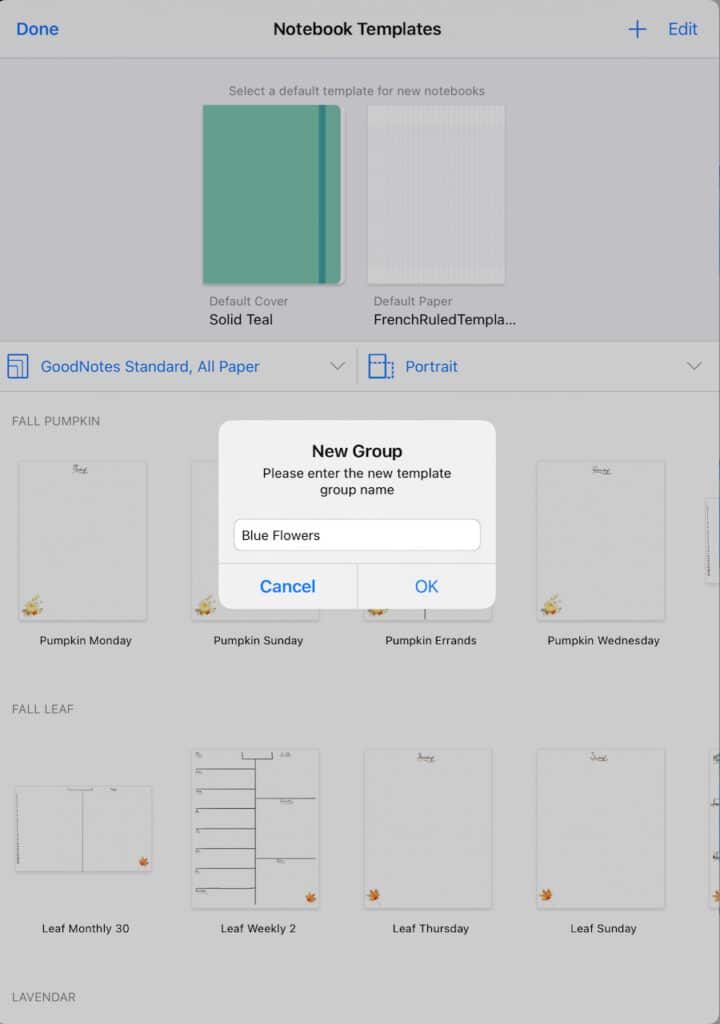
This dialogue will pop up so that you can name your new collection. - To add pages to your collection, click the plus icon with a circle around it.
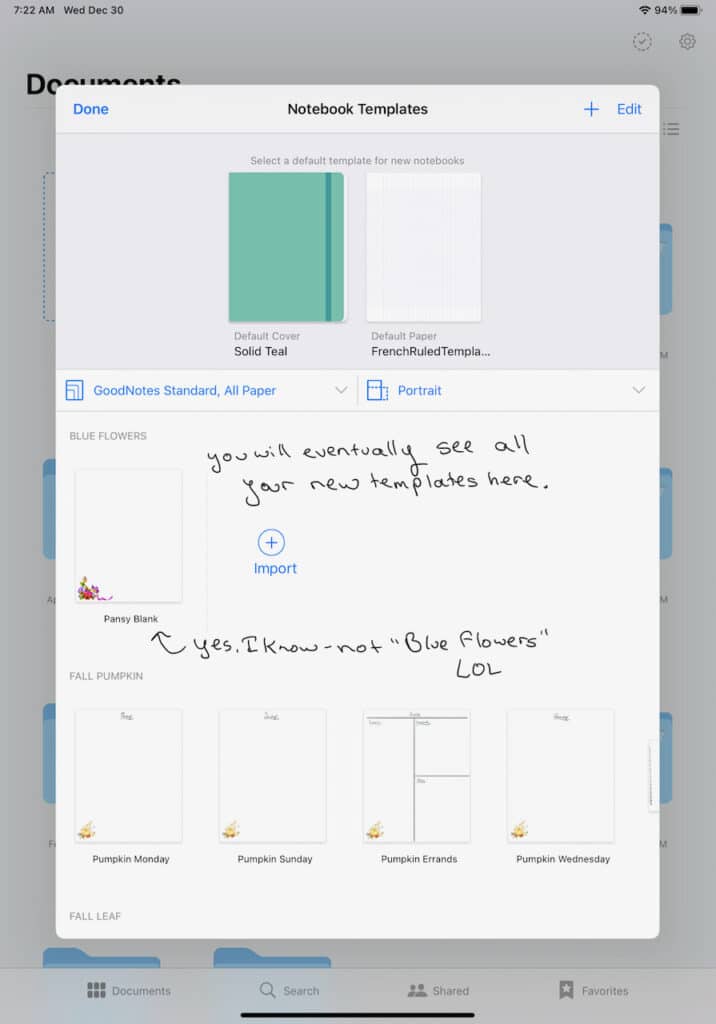
Click the plus button to add your new pages to the template library. - This will open a file browser. You can then navigate to your recently exported templates and add them one by one.

If you have saved your templates to the Files app on your iPad, then choose this one that is highlighted 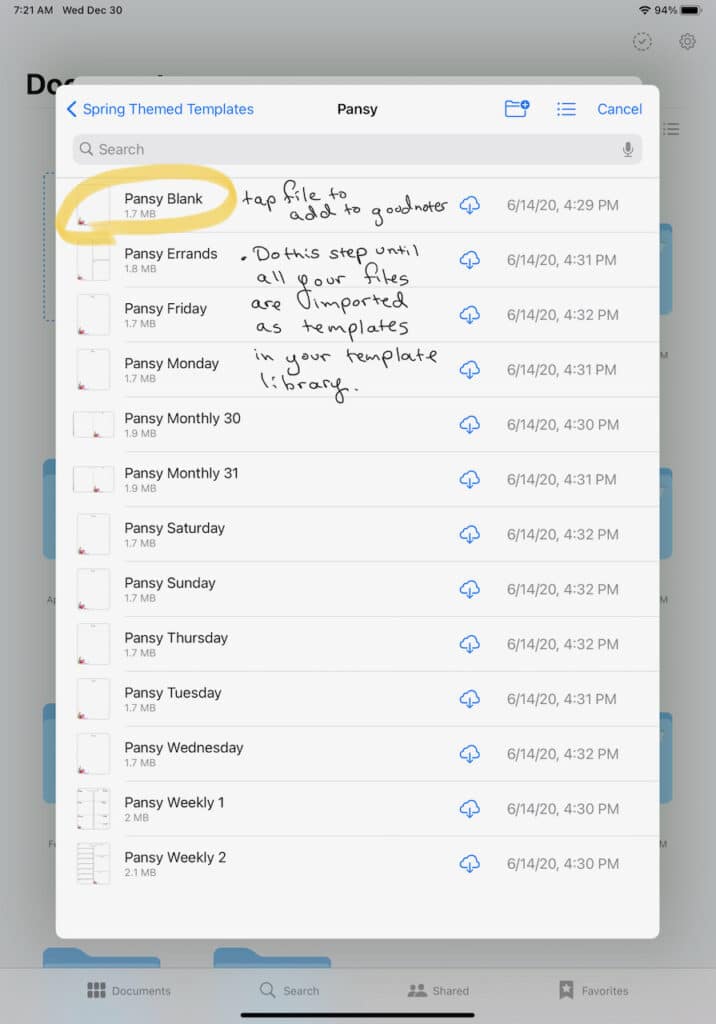
This is what the file browser will look like on your iPad once you are ready to add the pages. - Repeat steps 8-9 until you have added all of the pages of a collection.
- If you are using a Mac, you can add faster by selecting multiple pages at once.
- Once you are finished with the importing, you can then move the pages around in the template picker to be organized. You can “pick up” a page by holding your finger down on the page you want to move, and you’ll see an animation that looks like you’ve picked up a sheet with your finger. Then just drag it to where you’d like it to go.
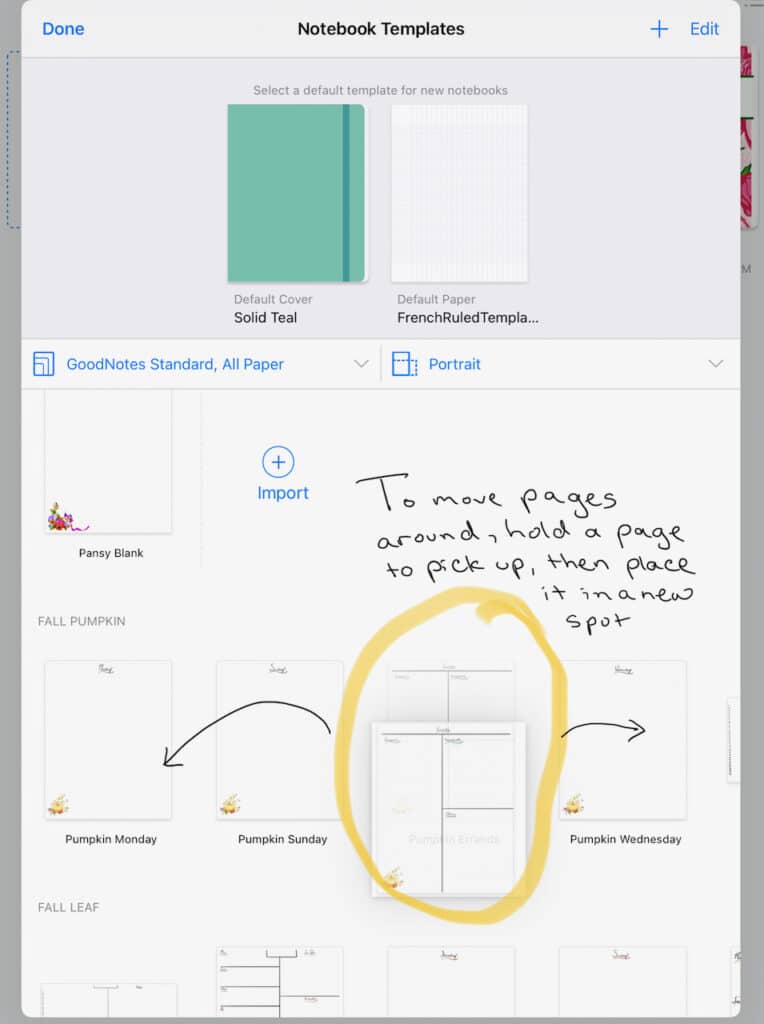
Press and hold on the pages to move them around in the template collection. This is your chance to organize the pages any way you want.
This is the process I go through to make sure that all my new seasonal template pages are available whenever I want to use them.
Setting up the Rest of the New Digital Bullet Journal
Once I am done with importing my template pages, my digital bullet journal is ready to be used every day. I don’t do a lot of extra set up for my annual journals. Sometimes, I will get a month template ready at the beginning of the month, and then have my daily pages ready afterward.
But, to be completely transparent, I usually just pick a daily page in the morning and start writing. If I have an idea about some errands I need to do, then I open up my template library and choose an errand page. Sometimes I just need a blank page to take notes for a doctor’s appointment. So, I go and pick one out.
I add my pages as I need them. This allows me to have a smaller notebook at the beginning of the year. I haven’t changed notebooks throughout the year, but I might decide to keep each notebook as a Quarterly Bullet Journal this year. At the end of 2020, my notebook was 536 pages. That is a long notebook!
I really like the freedom to add pages in whatever order I like. I have tried out pre-built digital planners. They have the months and the days already filled out for the entire year. It looks pretty, but I get frustrated because I can’t figure out how to edit them to suit my needs.
What is amazing about GoodNotes is that the pages and my notebooks still load quickly and smoothly without delay, even when my notebooks get to be the size of a long novel.
To Index or Not?
Traditional bullet journals have an index at the front. When you add new content to the journal, you will put a note in the index indicating what page that information is available on. For example, if I wrote some notes on my cleaning plan on page 56 of my bullet journal, I would indicate that on the index in the front. This makes it really easy to find my information in the analog notebook.
I don’t need to do that at all in the GoodNotes app. This is because the app has handwriting recognition. Everything you write is searchable. There is no need to create a manual index.
I have used the search feature to find random notes I have written. One example is a calculation I do to figure out how much dog food I need to send with my dogs during a house sitting stay. I search for “Dog Food” and GoodNotes finds the notes I made months ago. I can then copy the information and put it right on my daily page.
It is a really powerful app, and I have enjoyed using it to create and manage my digital bullet journals.
This is the process I go through at the beginning of the year to set up my new digital bullet journal in GoodNotes. I hope that you enjoy the new year and the ability to start fresh.
Happy New Year!
Jennifer Douglas
Jennifer Douglas is an author, patient advocate, and DCIS breast cancer survivor. After navigating her own breast cancer journey in 2019, she began writing and encouraging others who were newly diagnosed. Her resources include her book, "A Breast Cancer Journey: Living It One Step at a Time," and her online support course, "Encourage: Breast Cancer and Beyond." Jennifer also actively supports patients through her online presence and direct involvement in communities and support groups, offering guidance and encouragement every step of the way.


You May Also Like

How I Used GoodNotes and my Bullet Journal During Breast Cancer Treatment

Words of Focus and Intention for the New Year