How to Create a Sticker in GoodNotes
Have you ever found yourself writing a list over and over again? Maybe it’s a weekly routine you do at home or work. Or perhaps it’s a procedure you do every once in a while, but you don’t want to miss a step. Wouldn’t it be great if you could shortcut the time it took to write the list down? Stickers in GoodNotes are a great way to do just that!
I now have stickers in my GoodNotes library for my multi-step procedures. These are projects I do regularly that have multiple steps. I don’t want to skip a step, but I also want a way to make the task go faster. I love my routine stickers. They’ve shortened my time on these routines and made me more accurate.
How I Use GoodNotes Stickers
Before I share how to make a sticker, I’d like to share a few ways I use stickers in my GoodNotes bullet journal.
- Setting up a weekly video chat and reminder posts for a breast cancer group
- Calculating how much dog food I need to send to the house sitter for vacation
- Weekly housecleaning
- Blog Post creation
What I Love About GoodNotes Stickers
- Can be handwritten
- Customized to my needs
- Quick to create
- Resizable so they will fit on whatever page I need to put them in
- Organizable into collections
- Accessible across any notebook in my library.
- Free up my mental energy when I’m facing a project with a lot of steps
- Allow me to start and stop a project with confidence
More About GoodNotes Stickers
Preloaded stickers are available in the GoodNotes app, and you can also purchase stickers from creators online on sites such as Etsy. Check out this list of resources from GoodNotes on some of their recommendations.
I highly recommend checking out the GoodNotes blog here that details what these stickers, also called elements, can do. There’s also a link to a YouTube video on how to create an element.
How to Create a GoodNotes Sticker:
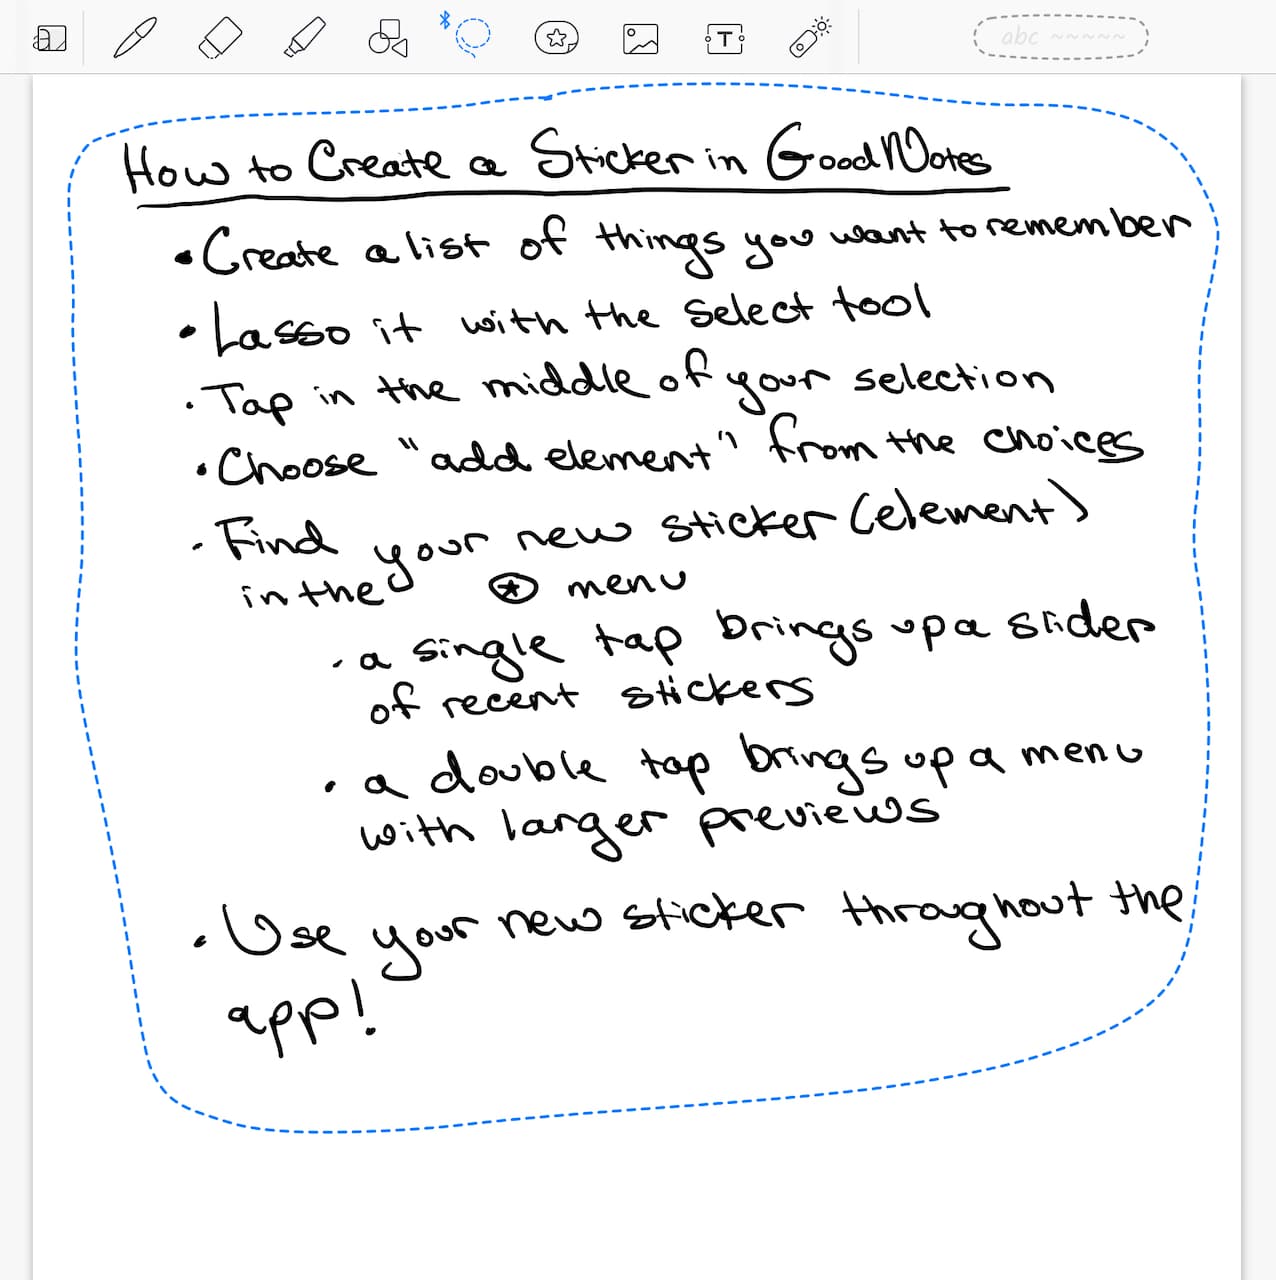
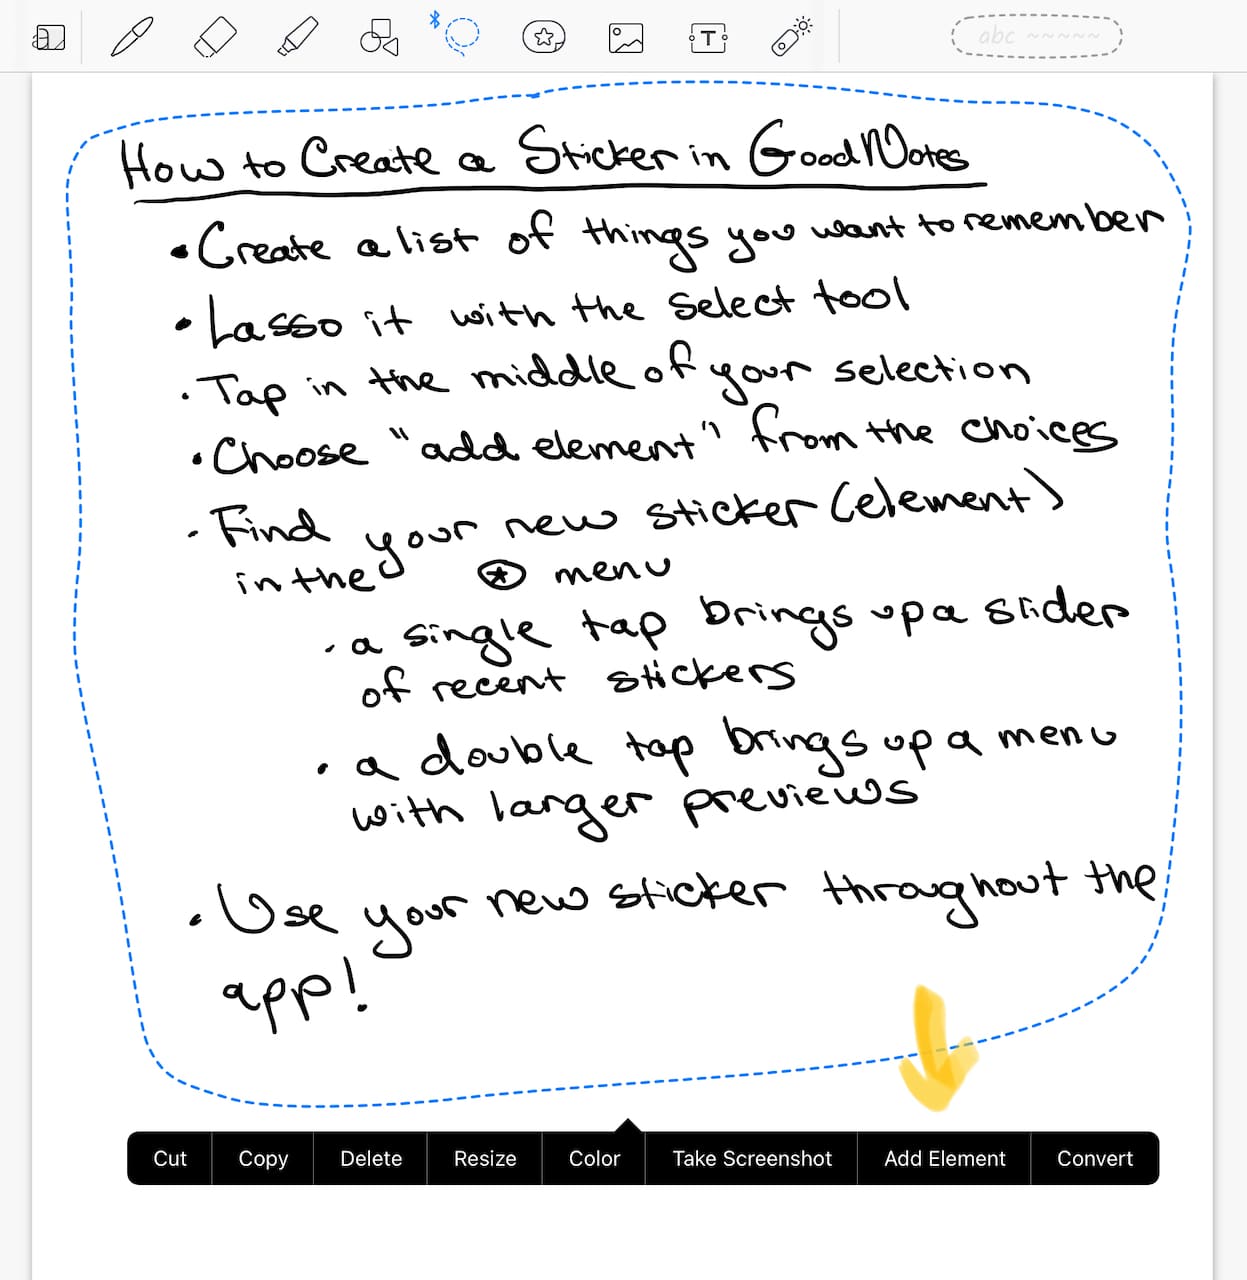
- Create a list of things you want to remember. I usually try to write neatly when doing this because I’m planning on reusing it. It doesn’t matter what Digital paper you use when creating the sticker because the background won’t be saved in the process. So, you could use lined paper to be precise and then insert it into any notebook.
- Lasso it with the Select Tool. Try to make sure you get the entire thing in the selection loop. Also, don’t worry about what size your list is. You’ll be able to resize the sticker anytime you use it.
- Tap in the middle of the selection to bring up the menu.
- Choose “add element” from the choices. GoodNotes stickers are also called elements. If you have a photo or a pdf that you’d like to make an element too, you can also use the elements menu to add that.
- Pick a collection to add it to. There are some preloaded categories already in the app. I decided to make my own to house my procedures called “Routines and Procedures.”
- That’s it! You’re all done! Wasn’t that fast and easy?
How to Find and Use Your GoodNotes Stickers
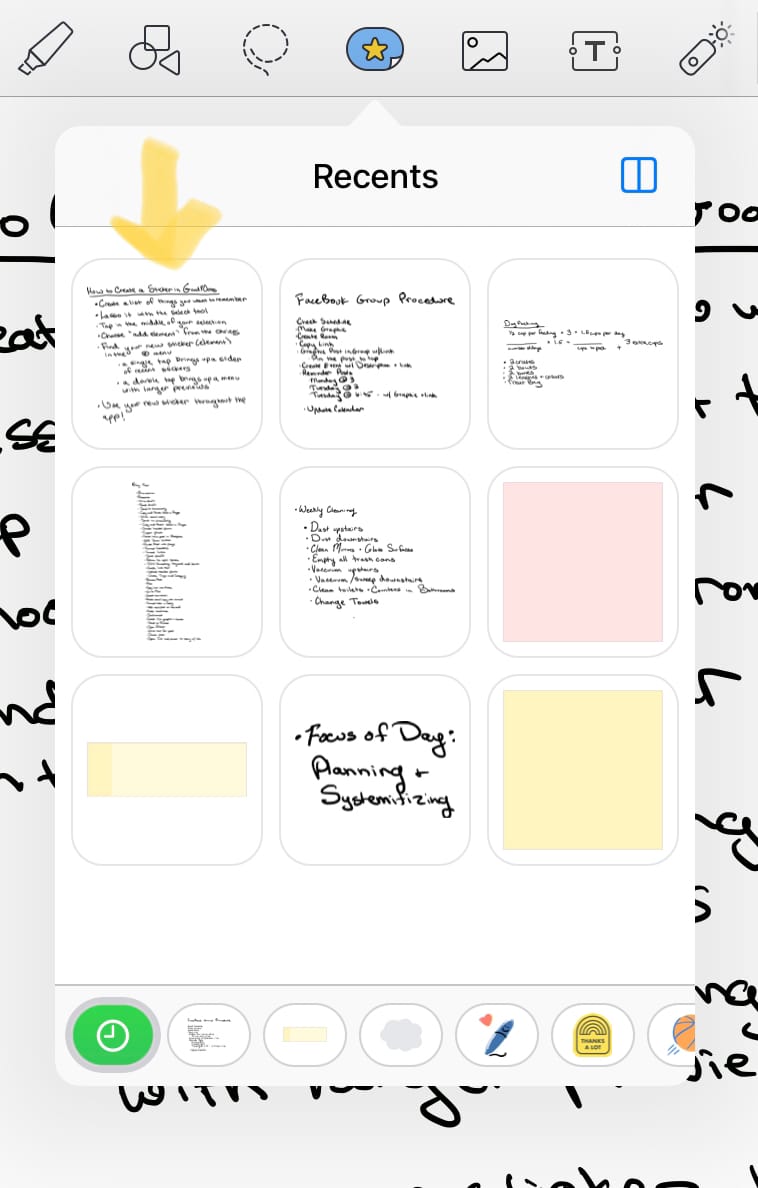
- Find your new sticker (element) in the elements menu (a rounded rectangle with a star in the middle of it.
- A single tap will bring up a slider of recent stickers. I usually have trouble picking which sticker I need with the tiny previews in the slider.
- A double-tap will bring up a menu with larger previews.
- Once you insert a sticker into a page, you can resize it or even change the color of the ink.
- To change the color, select the sticker you just inserted and tap in the middle. Then pick “color” from the menu.
- To resize, lasso the element and tap resize.
- Your stickers can be used across the app in whatever notebook you’d like.
- The handwritten stickers behave exactly like your handwritten notes. You can erase them as if you’d written them by hand. I like that because sometimes, I need to eliminate a step in one of my procedures.
I hope this helps you think about how to be more streamlined in your projects and procedures. I’ve discovered that stickers reduce the time I take to do certain processes. I can also batch my work easier.
How Stickers Help Me Batch my Work
Batching is a way to keep similar tasks together and help us be more efficient with our processes.
When I’m creating a blog post, many steps go into the process. First, I draft, edit, and choose a photo. Then I need to move into the website management to add the post, format it, schedule it, and fill out the SEO details. I’m tired just writing this down. If I try to task-switch between all these things, I get exhausted. I also slow down because these jobs require different parts of my brain. Am I writing or editing? I need to be in a creative space to write, but I can edit in the afternoon.
Now I have a sticker to insert into my notebook for my blog procedure. I can check off the tasks for each post as I do them. So, if I’m spending a week writing posts, I concentrate on writing. Then I can move on to the editing. I’m able to get into a flow and not skip any steps. It also allows me to leave tasks for a later date. Some things I can’t do until a post goes live. My blog post sticker enables me to keep track along the way.
If you have a project with multiple steps, maybe you can create a sticker for it in your notebook. That way, you don’t need to reinvent the wheel every time you start it again!


